
SwiftUIで円形のプログレス・進捗表示を実装する方法を紹介します。

円を作成
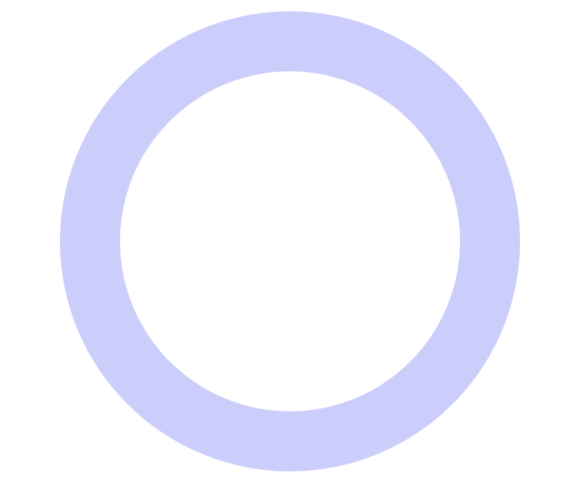
まずは、ベースとなる円を作成します。円はCircleを使用します。
ZStackで囲むことで、次の二つ目の円を追加出来るようにします。
var body: some View {
    ZStack {
        Circle()
            .stroke(lineWidth: 30.0)
            .opacity(0.2)
            .foregroundColor(Color(UIColor.blue))
            .frame(width: 200, height: 200)
    }
}
二つ目の円の作成
次に二つ目の円を作成します。
ポイントは.trim(from: 0.0, to: 0.3)です。二つ目の円で進捗を表示します。この0.3を変更することで、進捗率を変更できます。
.rotationEffect(Angle(degrees: -90))についてですが、円の始まりを一番上に持ってくるための処理です。これがないと、円が右端から始まってしまいます。
var body: some View {
    ZStack {
        Circle()
            .stroke(lineWidth: 30.0)
            .opacity(0.2)
            .foregroundColor(Color(UIColor.blue))
            .frame(width: 200, height: 200)

        Circle()
            .trim(from: 0.0, to: 0.3)
            .stroke(style: StrokeStyle(lineWidth: 30.0, lineCap: .round, lineJoin: .round))
            .foregroundColor(Color(UIColor.blue))
            .frame(width: 200, height: 200)
            .rotationEffect(Angle(degrees: -90))
    }
}
以上でSwiftUIの円形のプログレス・進捗表示の実装は完了です。
とても簡単ですね。
参考
https://www.simpleswiftguide.com/how-to-build-a-circular-progress-bar-in-swiftui/